To install the JSON Schema App on your Webflow website, follow these steps:
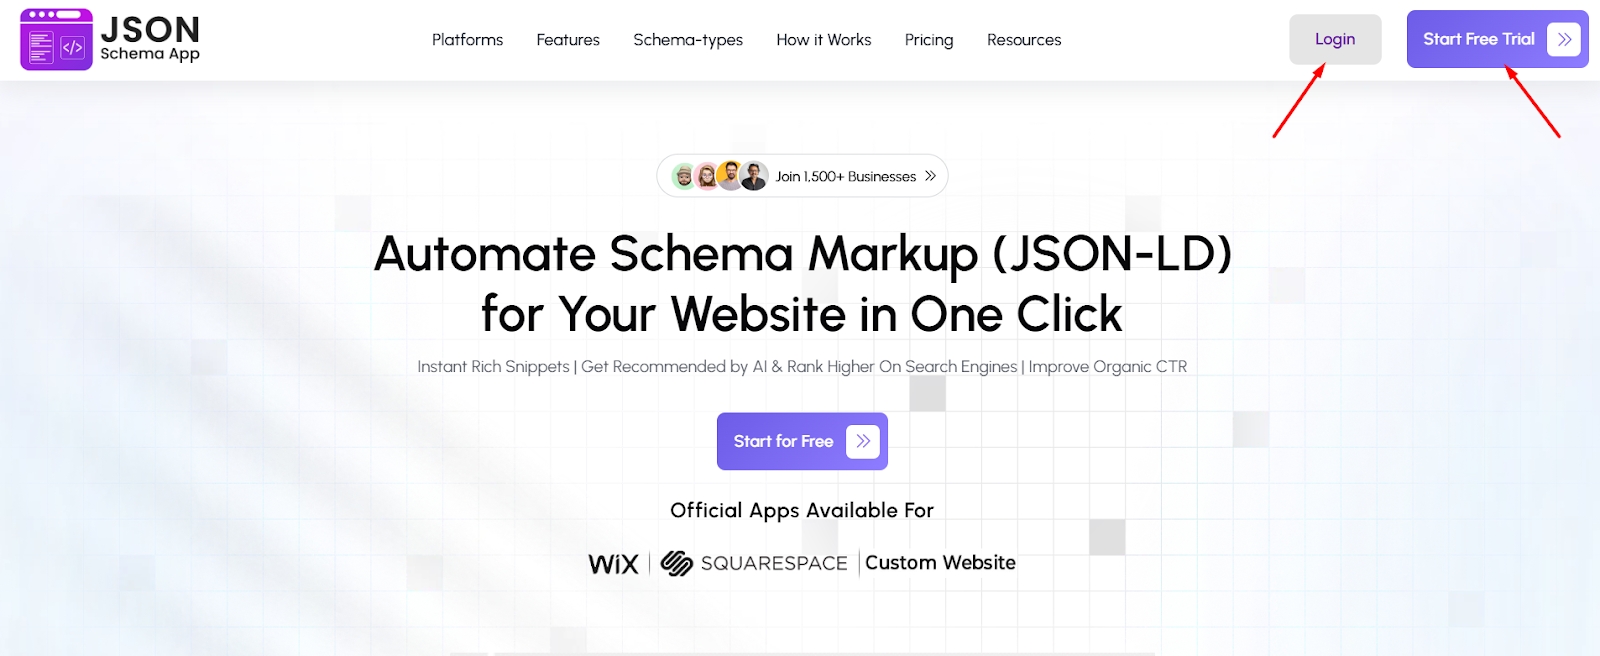
Step 1: Go to the JSON Schema App website and log in to your account. If you don’t have an account, click on “Start Free Trial” to create one and get started.
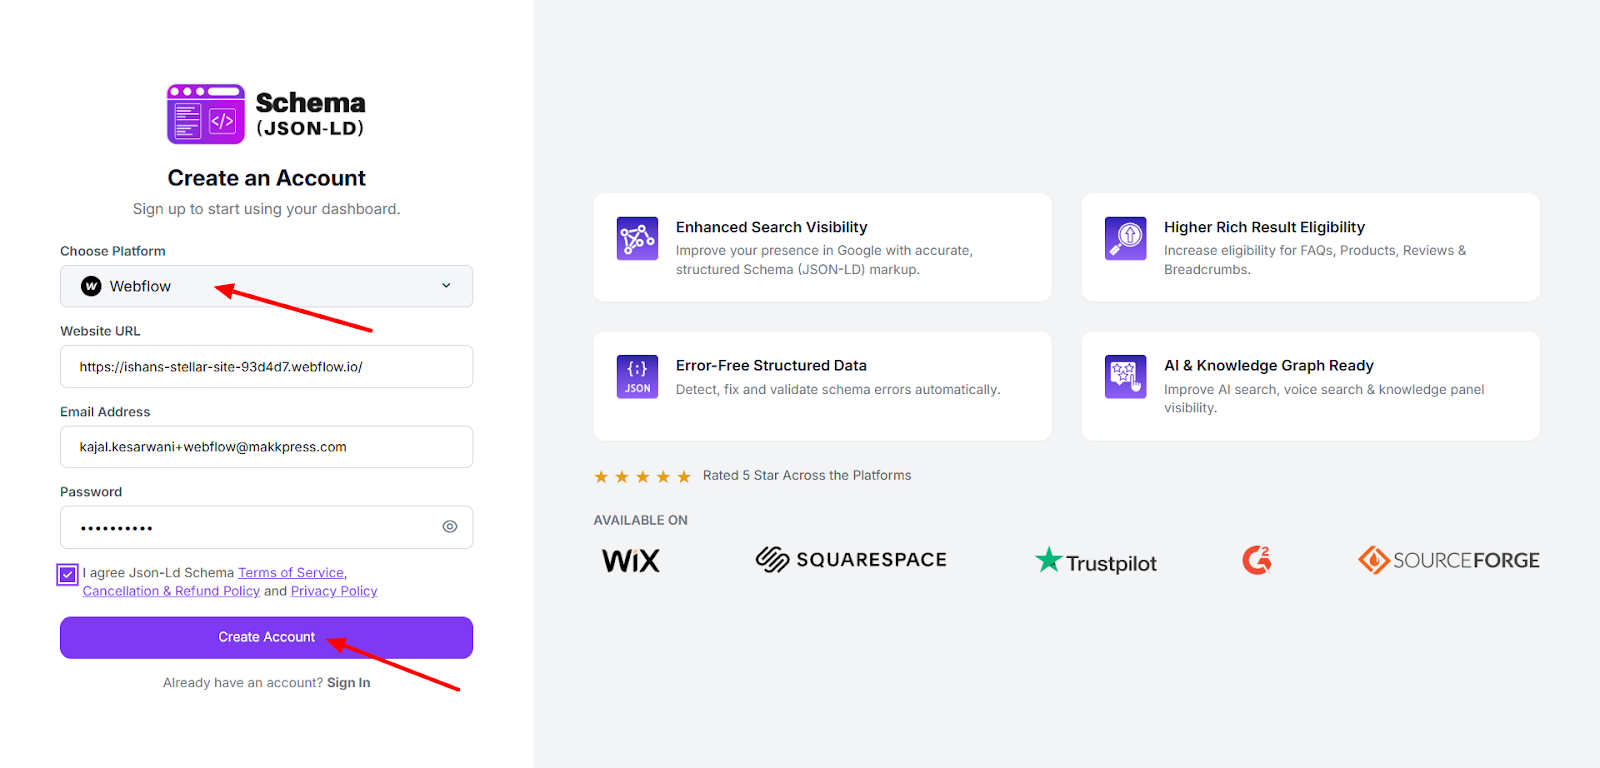
Step 2: Select Webflow as your platform, enter your website URL, email address, and create a password. Accept the terms and click “Create Account” to continue.
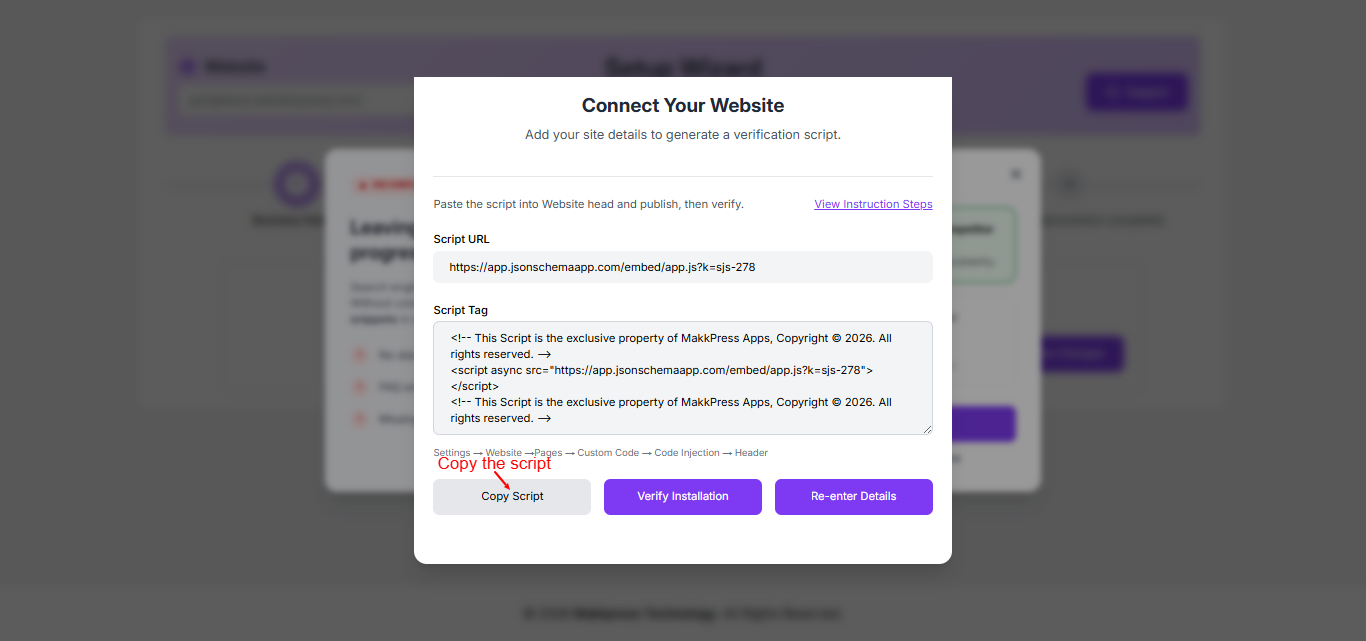
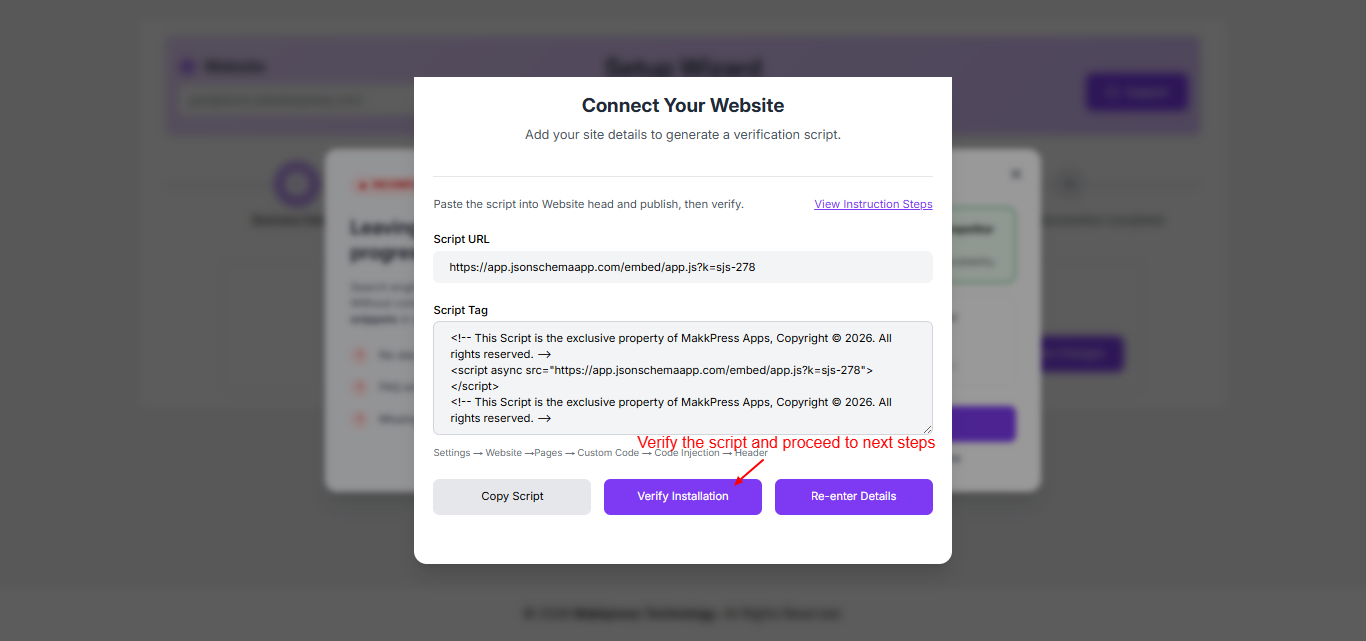
Step 3: In the setup screen, click “Copy Script” to copy the generated script. This code will be added to your Webflow website for integration.
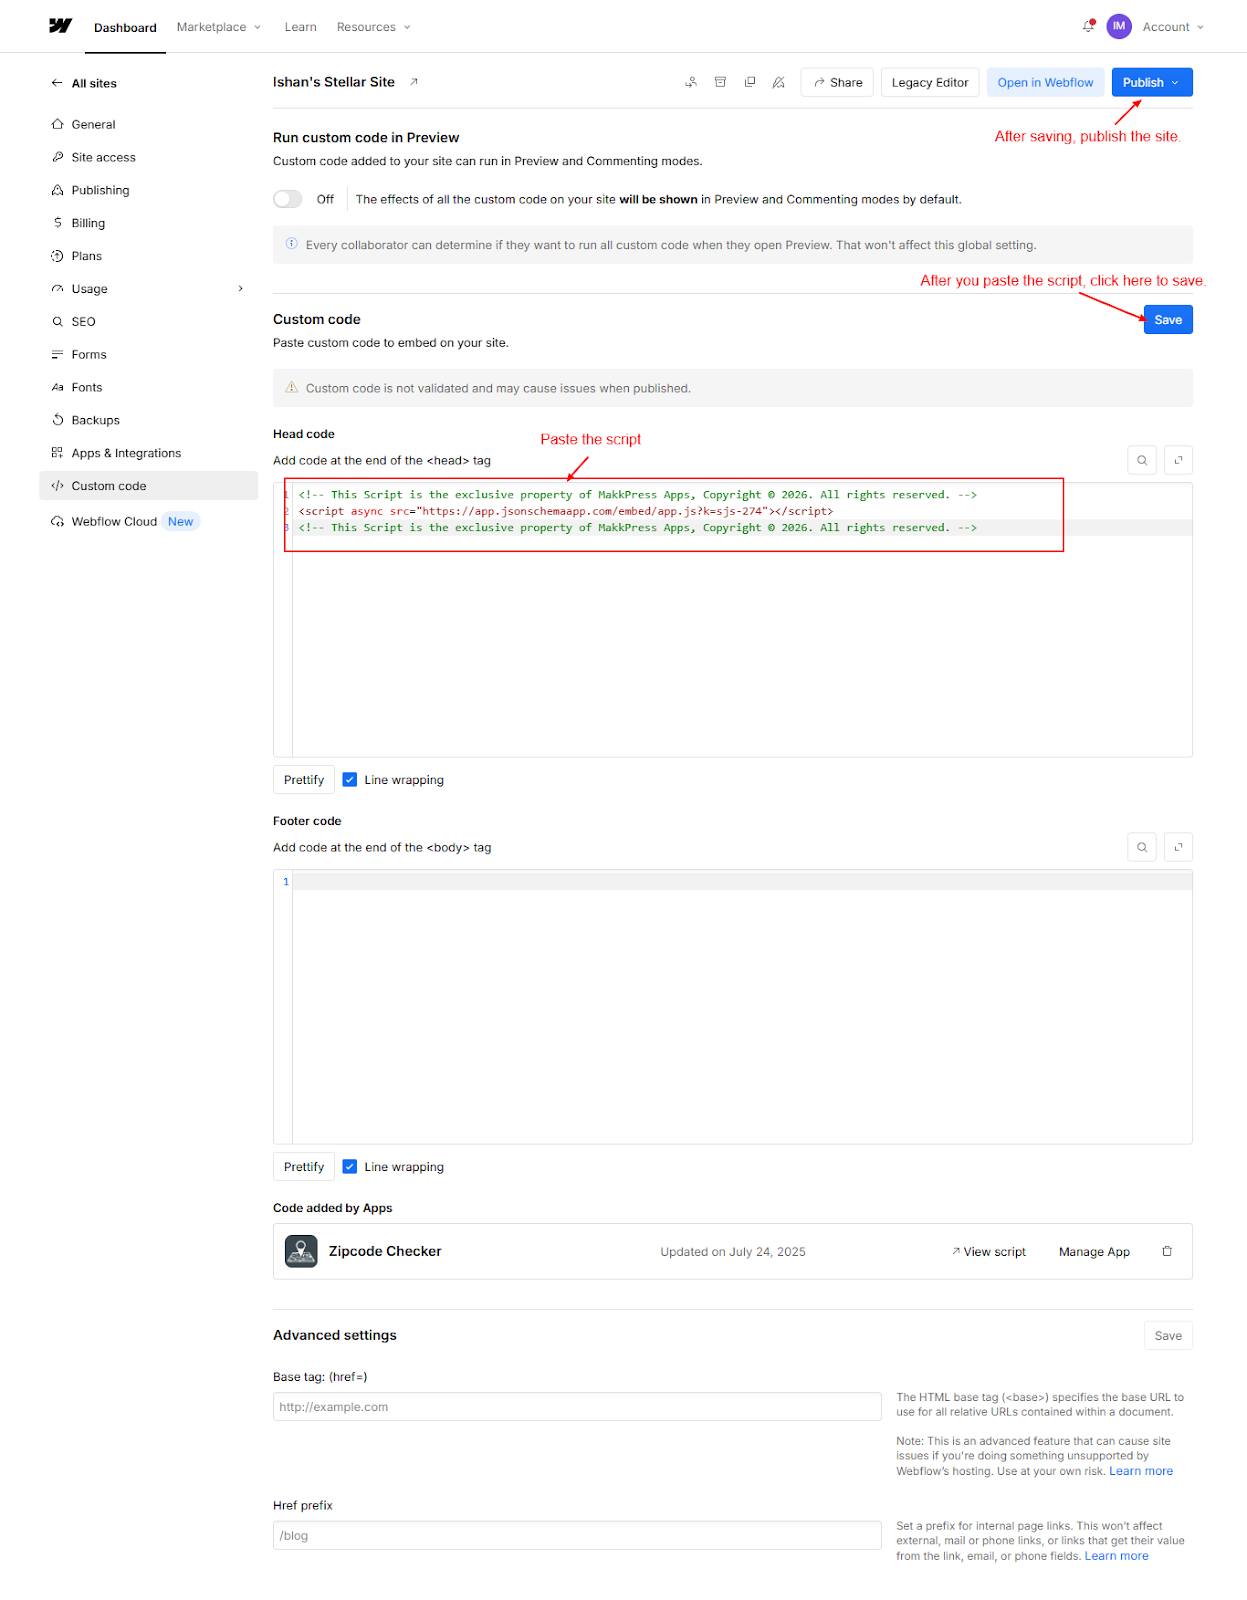
Step 4: Log in to your Webflow dashboard, go to Site Settings → Custom Code, and paste the copied script inside the Head code section. Click Save, then Publish your site to apply the changes.
Step 5: Return to the JSON Schema App and click “Verify Installation” to confirm that the script has been successfully added to your Webflow website.
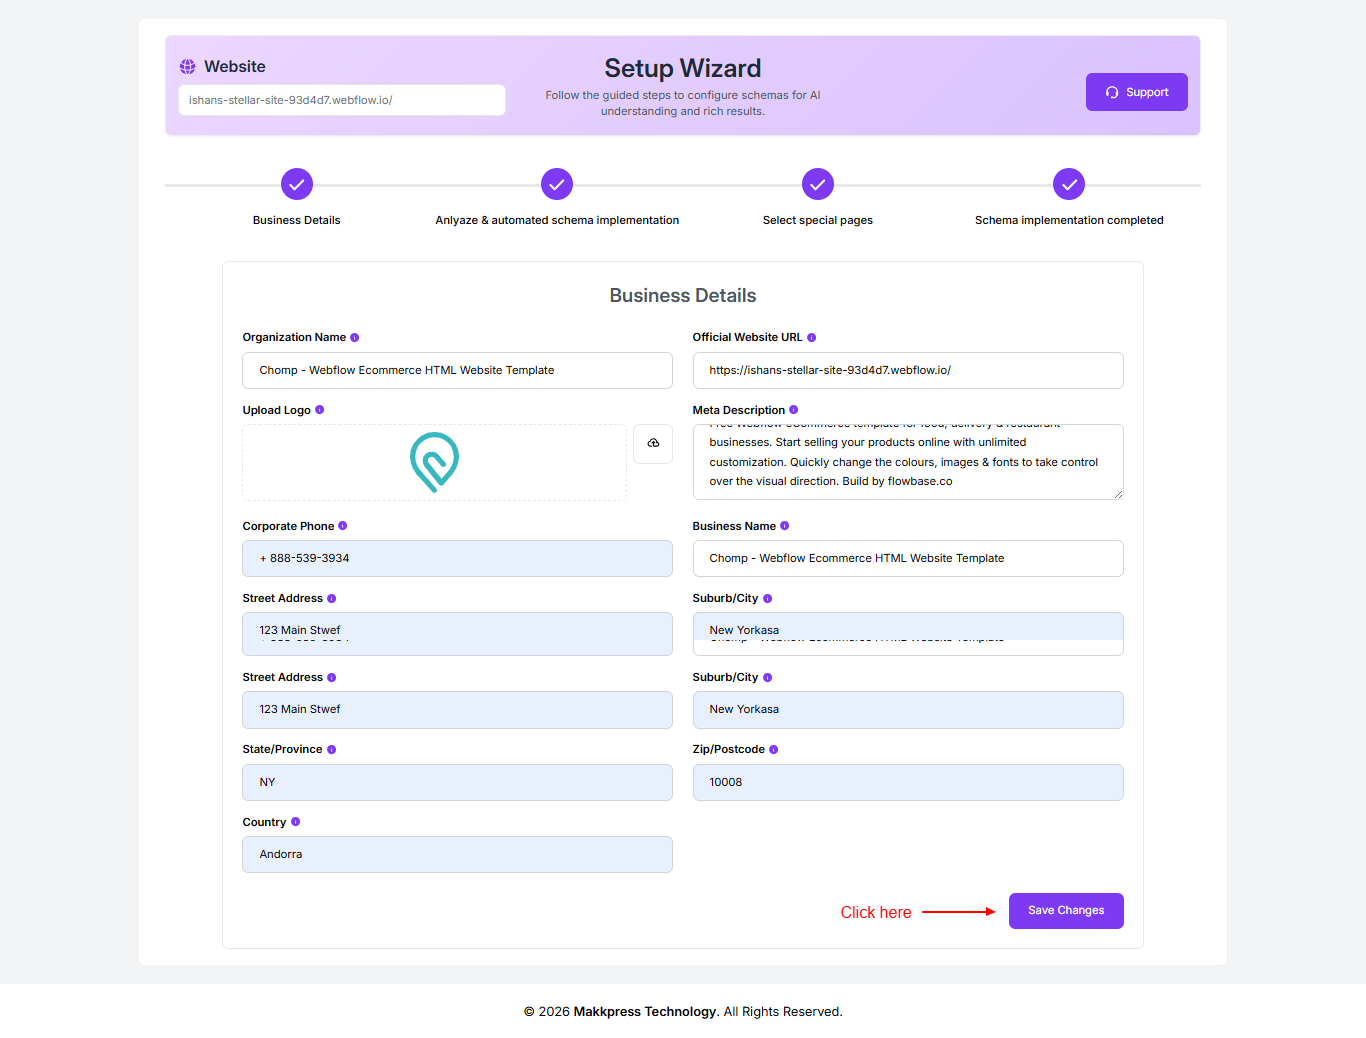
Step 6: Enter your business details such as organization name, website URL, logo, description, contact information, and address. Once completed, click “Save Changes” to continue.
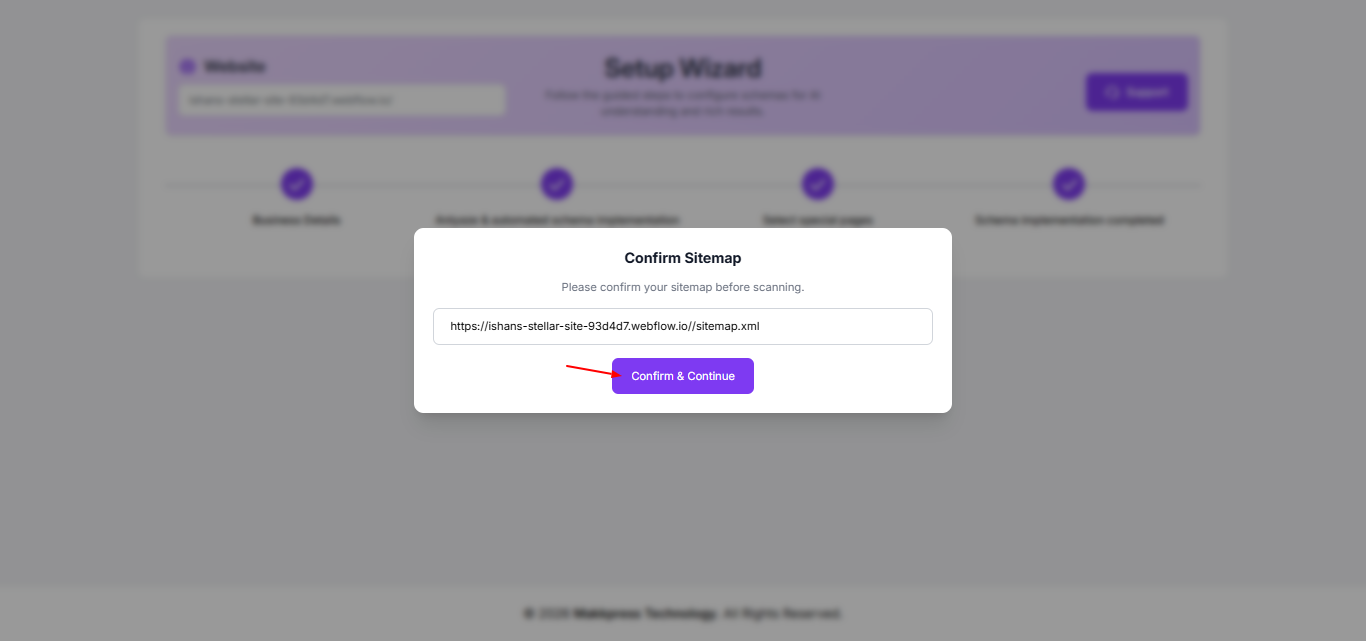
Step 7: Confirm your website sitemap URL and click “Confirm & Continue” to allow the tool to scan your Webflow website.
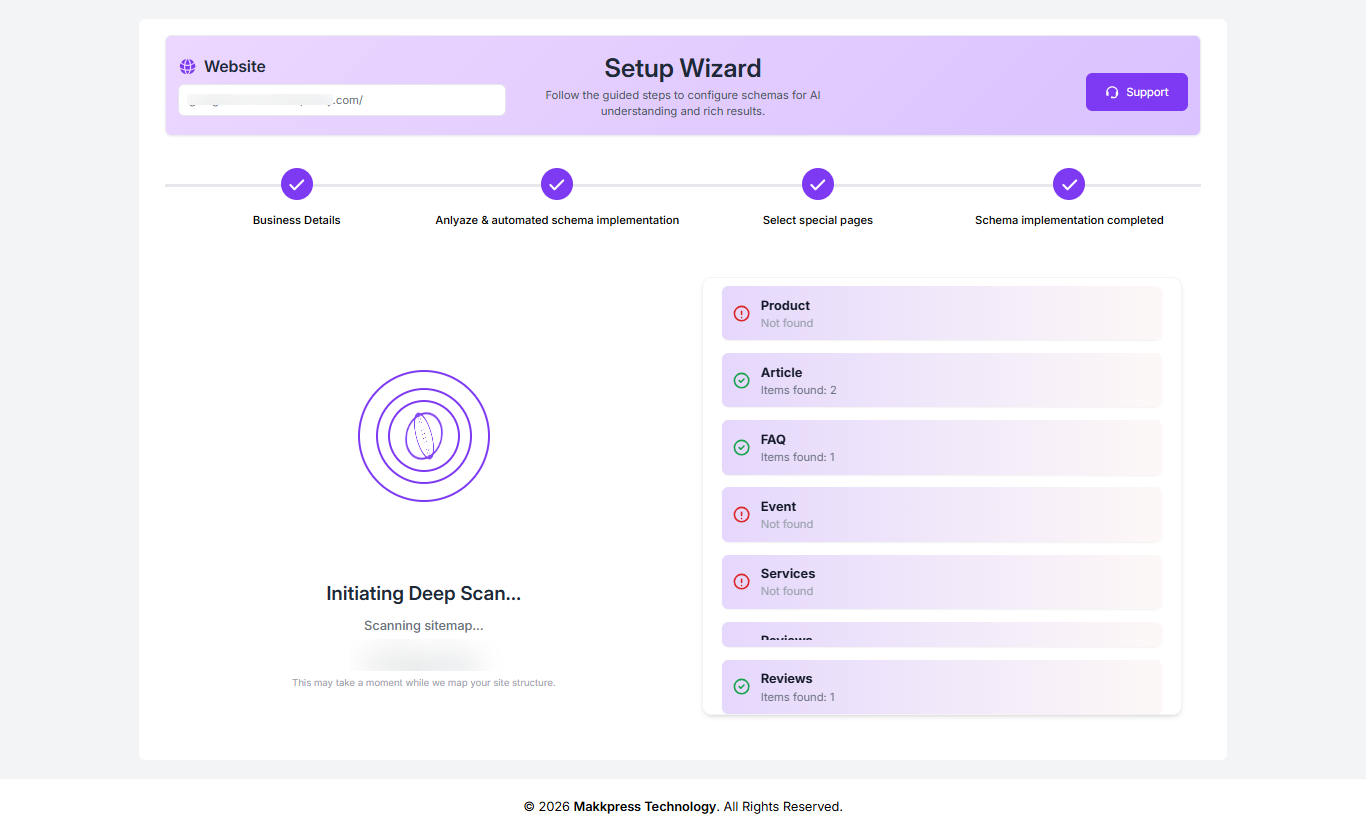
Step 8: The tool will begin a deep scan of your website to identify pages and detect applicable schema types automatically.
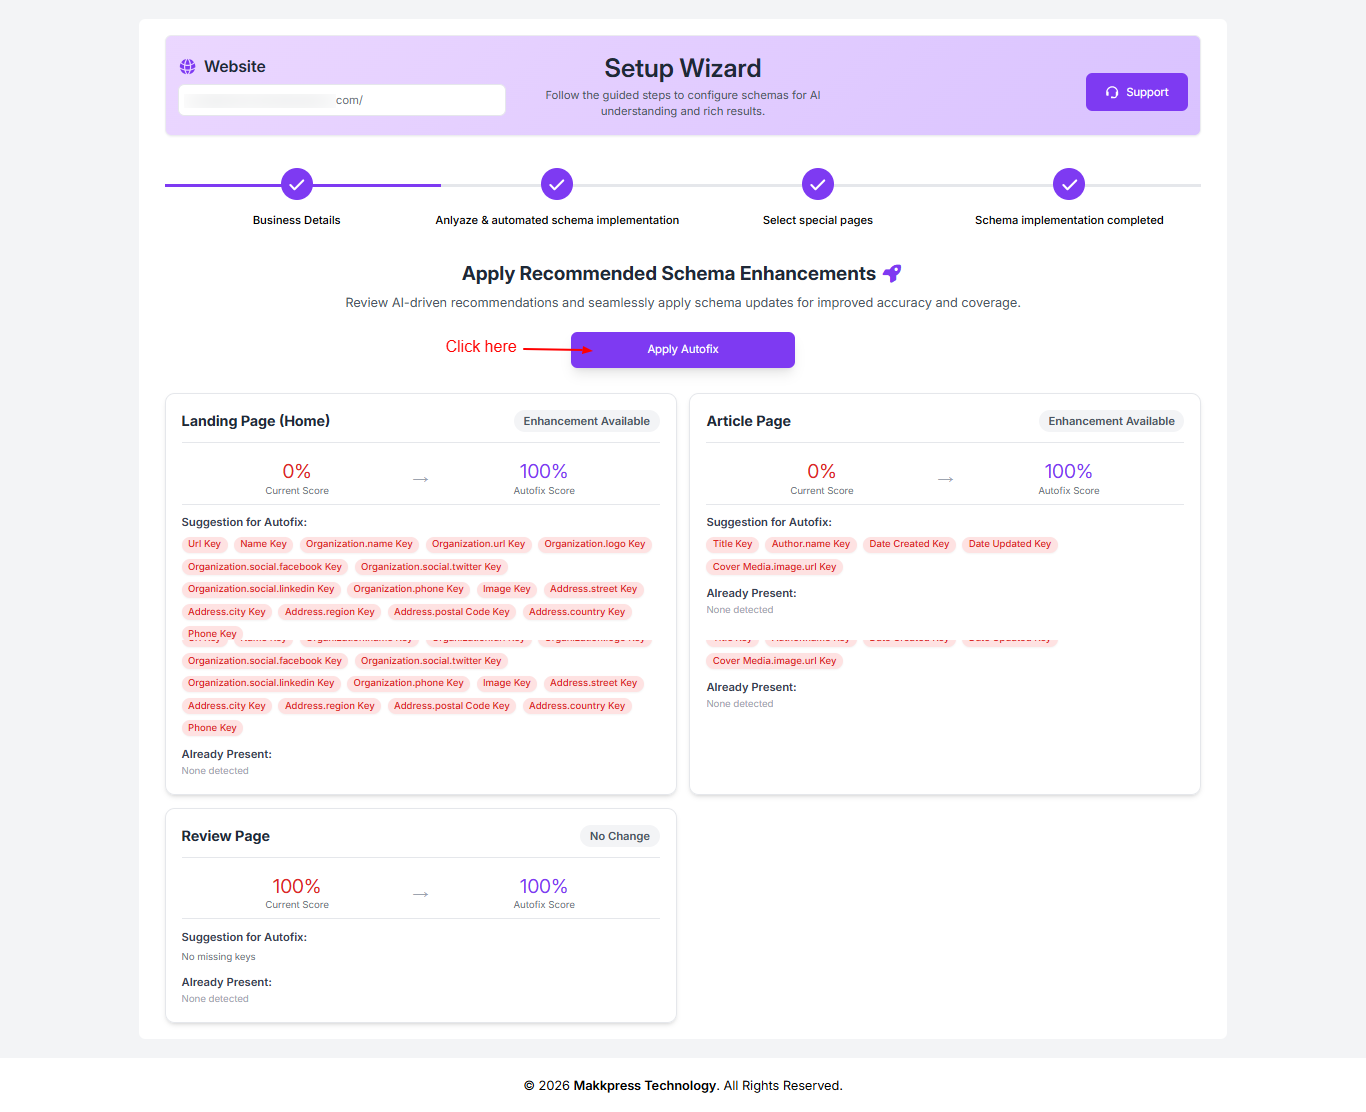
Step 9: Review the suggested schema enhancements and click “Apply Autofix” to automatically implement the recommended updates
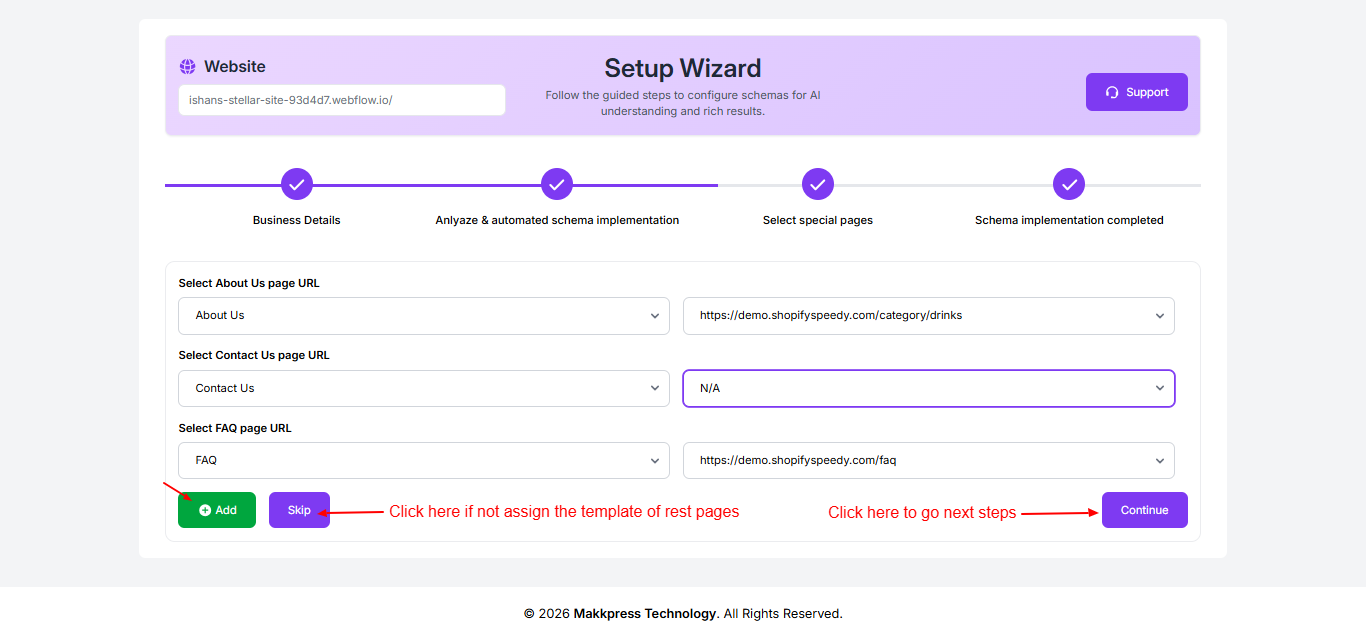
Step 10: Select important page URLs like About Us, Contact Us, and FAQ from the dropdowns. You can add more pages or skip optional ones, then click “Continue” to proceed.
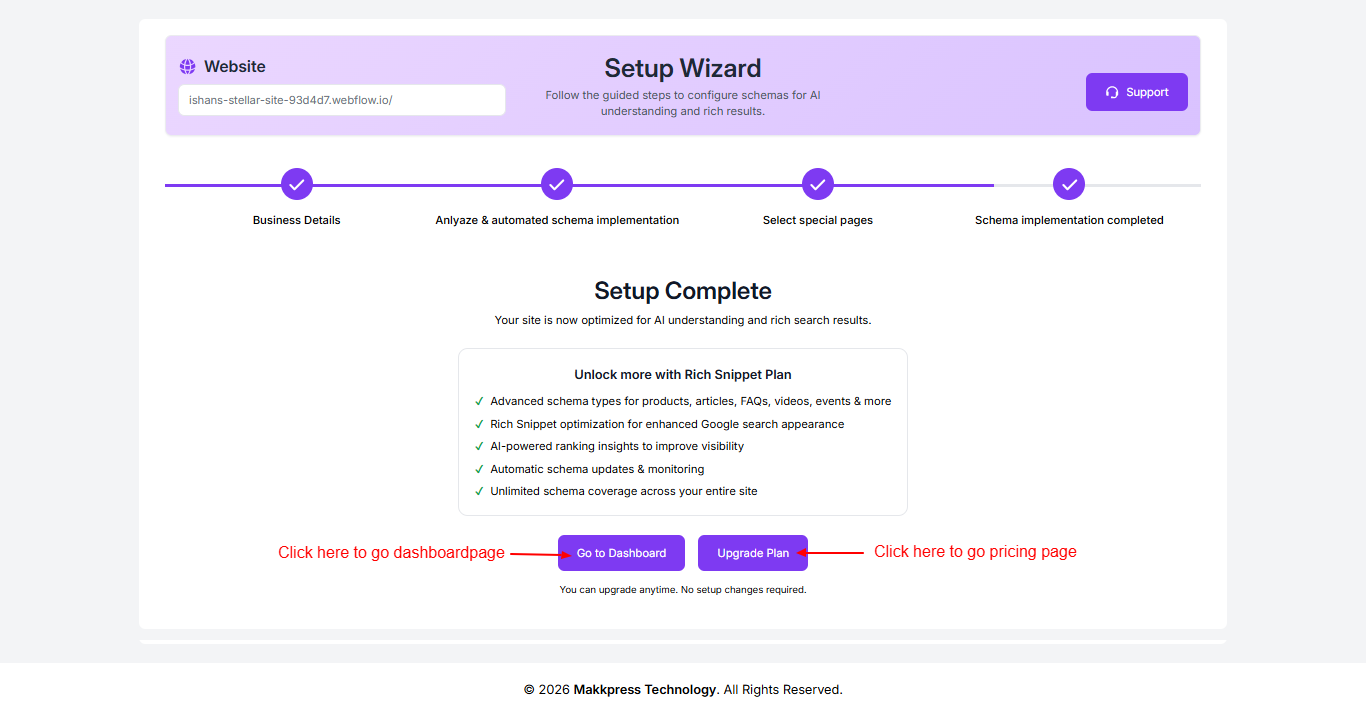
Step 11: Your setup is now complete. Click “Go to Dashboard” to manage your schema settings or choose “Upgrade Plan” to access additional features.
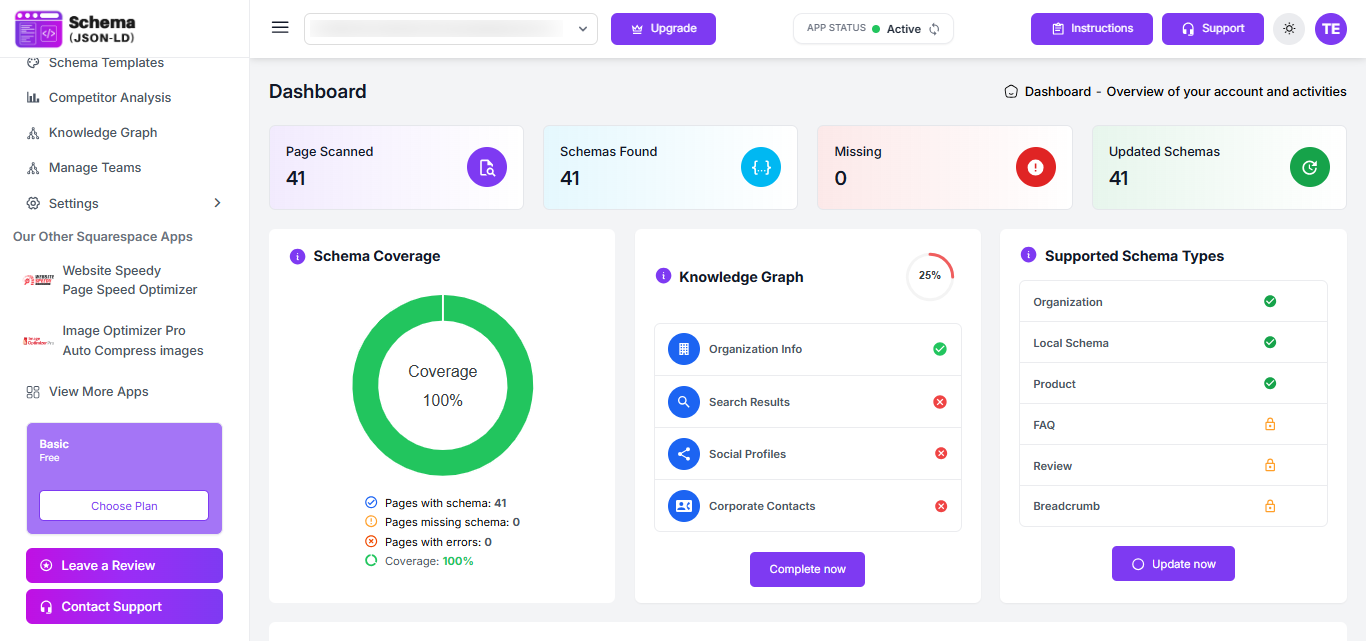
Step 12: After setup, you’ll be redirected to the dashboard where you can monitor schema coverage, track performance, and manage your structured data settings.
Found this helpful?
( 3 out of 5 found helpful )
